

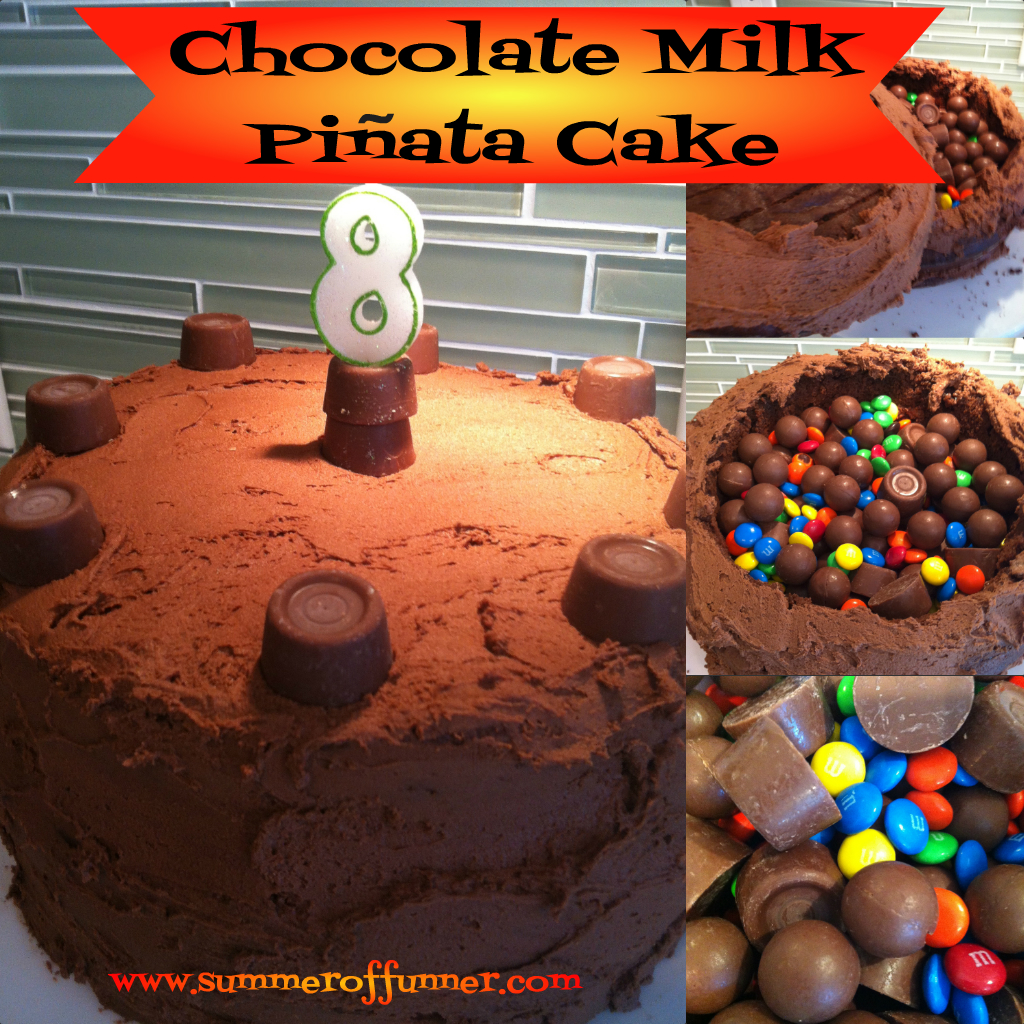
Two years ago, we made Toby an amazing Chocolate Milk Piñata Cake for his birthday. And, since we didn’t tell him it was a Piñata cake, the surprise on his face, when he sliced it open, was priceless!
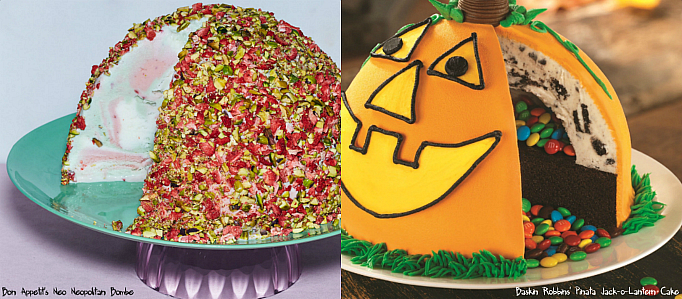
This year, Toby upped the ante on us by requesting an Ice Cream Piñata Cake. SRSLY, WT*? The closest I came for inspo on this one was a Baskin Robbins Piñata Jack-o-Lantern [I almost just ordered it and scraped the face off!] and an absolutely gorgeous, dinner-party-worthy Neo-Neopolitan Bombe from Bon Appetit – Le Sigh! Or, New Years, anyone?
Next thing I knew, I was pulling this cake out of the hat, or the stand mixer bowl, as the case may be! Using the metal bowl of our stand mixer, lined in plastic, as my mold, I created a traditional ice cream “bombe” like Bon Appetit’s, but with a difference. In stages, I molded a hole in the center of the bombe with a small, plastic-covered metal bowl, [you could easily just scoop the ice cream out, though, after freezing]. Then, I lined the hole with magic-shell, filled it with candy, covered the hole with a magic shell “lid” and packed the bowl with more ice cream! No S*! 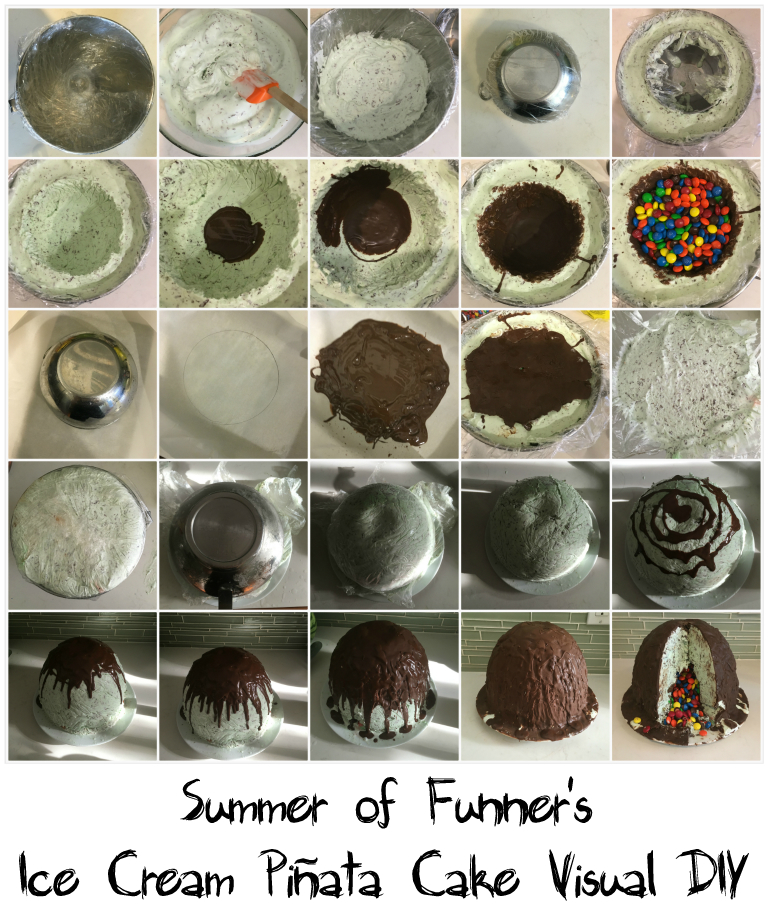
Finally, because the ice cream I used was a little on the soft and whippy side, and because our freezer picked this week to take “warm” breaks on us [Summer ’16, what gives?], after plating the bombe, I coated the entire thing with magic shell to keep it in tact in the freezer until the family pizza party!
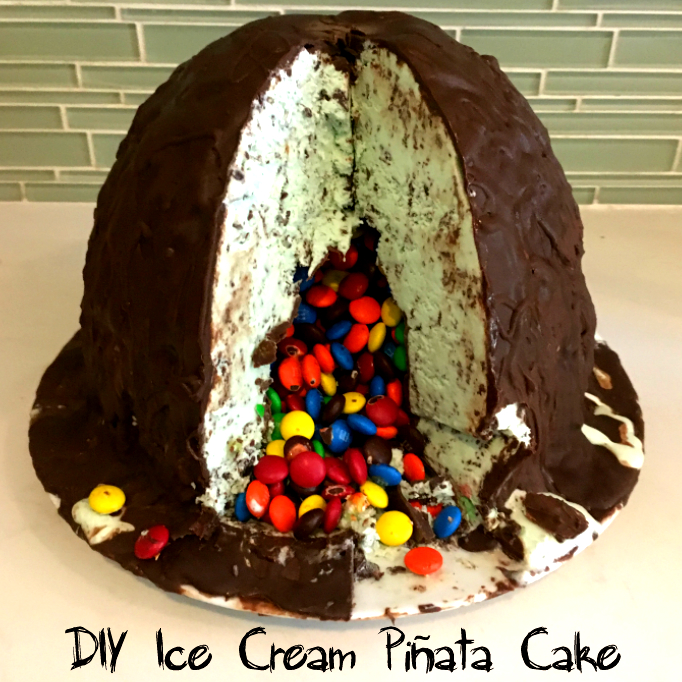
The result? A birthday ice cream piñata cake that’s truly the Bombe Dot Com!
One thing to note about this DIY, folks, especially if you’re using more of a whippy ice cream [though, based on my experience, I’d suggest you get the hardest, thickest-set store-bought or specialty-shop ice cream possible], this project takes a lot of hands-off time setting up in the freezer. So, get started 2-3 days before your event! And, be sure to clear a shelf in your freezer for your masterpiece! On the flip side, the whole thing is way easier to make than it looks, especially if you use store bought ice cream, candies, and magic shell, and skip the home-made route. That’s right, you can DIY your own magic shell. But, seriously, when you’re building a candy filled, chocolate coated ice cream mountain, why take the risk?

Ice Cream Piñata Cake
Ingredients
- 4 pints ice cream the less whippy the better.
- ~300 g of M&Ms or other freezer-worthy candies
- 3-4 205 g containers of Magic Shell
- A large metal bowl [we used the Kitchenaid stand mixer bowl]
- A small metal bowl about 1.5-2 cups in measure [or an ice cream scoop]
- Plastic wrap
- Serving plate larger than the circumference of your large metal bowl
- Spatula
- An extra bowl for handling softened ice cream
- Parchment paper
- Pencil
- Pastry Brush [optional]
- Large knife for serving
- Bowl of hot water for keeping the knife warm
Instructions
PREP THE BASE
- Set 1 1/2 pints of ice cream on the counter to soften slightly.
- Line the entire INSIDE of the large metal bowl with sheets of plastic wrap that extend well over the edges of the bowl.
- In a spare bowl, place about 1-1 1/2 pints of the softened ice cream and stir with a spatula.
- Spread ice cream evenly into the lined mixer bowl and allow to freeze for at least 2-3 hours.
CREATE THE CANDY BOWL
- Bring another 1 1/2 pints of ice cream out onto the counter to soften slightly.
- *Line the OUTSIDE of a small metal bowl with plastic wrap that extends well over the edges of the small bowl.
- Place the bowl, bottom down, in the centre of the frozen ice cream in the mixer bowl and tuck the little bowl's overhanging plastic wrap inside of that little bowl. [Now is the time to make sure that the there is still about 1 1/2 - 2 inches from the top of this small bowl to the top edge of the large mixer bowl.]
- Carefully spoon or press ice cream into the large bowl around the edges of this little bowl, filing just below the top circumference of this little bowl.
- Return to the freezer and freeze overnight.
- Remove the small metal bowl and its plastic wrap from the inside of the large mixer bowl of ice cream.
- *[Alternatively you can simply fill the mixer bowl up to about 2 inches from below the bottom with ice cream and freeze overnight. Then, scoop out a large hole in the centre of the ice cream and reserve that for the top.]
FILL THE CANDY BOWL
- In small batches, drop magic shell into the centre of the hole in the ice cream and swirl the bombe around until the entire indentation is covered in a layer of magic shell. You can use a pastry brush to help coat towards the end, if necessary.
- Cover and refreeze.
- Place a plate or small metal pan in the freezer.
- On a piece of parchment paper, trace the circumference of the small metal bowl with a pencil.
- Reverse the parchment onto a plate or metal pan.
- Cover the entire circle and the area about a half inch outside of its circumference with magic shell, and freeze for at least 1 hour.
- Remove plated circle of magic shell from freezer and carefully remove the chocolate circle from the parchment.
- Remove the large ice cream bombe from the freezer, uncover, and fill with M&Ms or other candies.
- Place the disc of chocolate on top of the candies. If necessary, use a bit more magic shell to seal the circlet down. [I didn't bother.]
- Place the bombe back in freezer for at least an hour.
FREEZE THE WHOLE
- Let the last pint of ice cream soften a bit and then stir with a spatula.
- Careful not to disturb the chocolate circlet on the top of the bombe, spread enough ice cream on the top of the bombe so that the large metal bowl is completely filled.
- Cover with plastic wrap and freeze well, at least 12 hours.
FINISH THE BOMBE
- Remove the bombe from the freezer and select a serving plate that fits in your freezer.
- Remove all of the plastic wrap from the top of the bombe and open all plastic wrap that extends from within the bowl.
- Reverse the large mixing bowl onto the serving plate.
- With a warm cloth or sponge, remove the frost from the metal bowl so that bowl is just slightly warmed and you can lift it off the bombe.
- Life the bowl off of the bombe so that bombe now rests on the plate, covered in its plastic.
- If the bombe is at all soft, remove to the freezer immediately.
- Remove the plastic from the bombe.
- Working from top to bottom, carefully drip as much magic shell as you would like onto the bombe. [We covered the entire thing!]
- Return the bombe to the freezer until ready to serve!
SERVE
- Slice the pinata cake with a large, warm knife.
- We kept a large bowl of hot water on the side to refresh our knife as we served our guests.
- Immediately after plating your BOMBE DOT COM for your guests, refreeze the extras!
Comments are closed.